
The story
I became interested in hydroponics the fall of 2006. I love plants and gardening but am very limited on actual gardening space (apartment living.) I picked up a hydroponics book from the library and started tinkering. (This also happened to be right around the time of a huge number of bagged spinach and lettuce recalls due to e. coli contamination.)
I tried several different deep water culture methods for hydro in my apartment as well as some other odd little experiments out on the patio. I found that if I am careful, I can grow enough lettuce to keep two people in salads using one 4' light and a big ice chest.
Since then
I have moved out of that small apartment but I still keep lettuce growing indoors in a simple hydroponic system because it is too hot most of the year here to easily grow lettuce outdoors. I have one system I've been tinkering with outdoors but I think it will soon become a simple pond that can produce some food from aquatic plants.
I saw no appreciable difference between the soil grown plants and the hydroponic grown plants when I had both growing. They all produced and they all were attacked by pests and disease about equally. My test plants were cucumbers and I tried it for two seasons. I can no longer justify the extra $$ of pumping, media, nutrient, testing supplies, plastic, etc. for something I can grow just as well in free compost. The pump and some of the other stuff will be great for some water gardening which can supply some food and is kinda like Hydroponics/Aquaponics.
So back to my original interest, indoor hydroponics for salad greens.
Lighting
I'm using florescent lighting and mylar emergency blankets to get as much light as possible to the plants. The emergency blankets are inexpensive compared to the mylar sold by hydroponics stores. The florescent lighting doesn't use as much electricity for the amount of light and they also don't heat up the apartment as much as any other lighting would. In the new house I have only set up one light. I started off just trying to grow the lettuce in front of a south facing window but that wasn't providing enough light even with only a slight overhang provided by this roof. I have since hung one florescent fixture over the lettuce system.

My lights are 2' wide by 4' long units with 4 tubes and good reflectors. The tubes are 54 watt T5 and I'm using all Cool (bright blue) spectrum grow lights. The full unit uses 216 watts. It also has a little outlet on the opposite end from the plug so you can plug two lights together or, as I have done, plug a little fan in.


If you are growing plants indoors, the lighting and electricity are going to be your biggest costs. The cost of even an expensive hydroponic system and nutrients will pail compared to the electricity used for lighting in the long run. Natural light is much more economical if you have the climate for it. With the way prices for electricity are going up, I'm probably paying about $20 a month to grow my lettuce indoors, it may not really be worth it anymore.

My lights are 2' wide by 4' long units with 4 tubes and good reflectors. The tubes are 54 watt T5 and I'm using all Cool (bright blue) spectrum grow lights. The full unit uses 216 watts. It also has a little outlet on the opposite end from the plug so you can plug two lights together or, as I have done, plug a little fan in.
If you are growing plants indoors, the lighting and electricity are going to be your biggest costs. The cost of even an expensive hydroponic system and nutrients will pail compared to the electricity used for lighting in the long run. Natural light is much more economical if you have the climate for it. With the way prices for electricity are going up, I'm probably paying about $20 a month to grow my lettuce indoors, it may not really be worth it anymore.
Testing Equipment and supplies
It is possible to do hydroponics without such stuff, but I don't really recommend it if you are going to do more than a few gallons worth. If you can test your nutrient strength and pH, you don't have to completely change out all your nutrient as often and you don't have to guess about how strong you are mixing the nutrients. I've used test strips for pH and it seems to work though they are not super precise. I also got a cheap pH tester which worked for a little while but now doesn't seem to work at all. Any pH meter has more costs than just the meter alone. They need to be kept in a buffer solution when not in use (this costs), they need to be cleaned and calibrated with solutions which cost money, and the probes eventually need replacing (if they can be or the whole thing needs replacing.)

As for nutrient strength, this is often measured in EC or CF (ok off the top of my head I forget the exact terms these stand for but they are basically a measurement of conductivity of the salts in the solution.) CF is usually given in numbers between 0 and 36 while EC is given as 0.0 through 3.6 . They are the same except for the decimal point. Watch out for nutrient strengths given in ppm, there are two separate scales for ppm and I don't know how one is supposed to know which one is being quoted. One is the EC x 700 and the other is the EC x 500 Hence I tend to ignore information that tells me to feed such and such plant at such and such ppm. Most lists now give recommendations in EC or CF now anyway. My tester of choice for nutrient strength is the truncheon or dipstick. Mine is the bluelab truncheon, Very easy to read and no calibration needed, only regular cleaning. There is no on/off switch to forget to turn off, it takes three AA batteries which I've only replaced once in the year I've been using it. Oh, and it is water resistant so dropping it into the tank doesn't necessarily meant it's toast, which is a good as it is kinda pricey.

Nutrients
Let me start by saying (as far as I know of) there is no such thing as a commercially available certified "organic" hydroponic nutrient. I see people ask about organic hydroponic nutrients but so far such things are not on the market. Perhaps there are some hydroponic nutrients or supplements that have the word organic on the label but that is probably only referring to some of the contents since the nitrate in most complete mixes keeps them from qualifying as "organic.)
Also, I see many people ask about using Miracle Grow or another readily available fertilizer for their hydroponics. Miracle Grow and other such fertilizers are meant to be used on plants growing in soil or potting mix that have microbes to process the urea nitrogen into the plant usable nitrate nitrogen. This doesn't work very well in a hydroponic media without such microbes and hence the plants usually suffer from nitrogen deficiency. It is probably better to use a nutrient specifically for hydroponics rather than trying to use something like Miracle Grow, however, I have heard of people using it in conjunction with calcium nitrate and other things though I don't personally know the recipe.
So far I've only used the cheapest dry powder Hydroponic nutrient mixes I could find. They happen to be the General Hydroponics Maxi Grow (complete mix for vegetative growth), Maxi Bloom (complete mix for blooming and fruiting stage plants), and Flora Magic (which is a complete general purpose mix for any/all stages.) They all seem to work just fine for me. I can't share any experiences or advice about any of the other types of nutrients.

Type of hydroponic culture
There are many types of Hydroponic culture, I may touch on ones I've never used but I will primarily stick to telling about what I have tried and how well it worked. I have a few simple favorites which I will describe in full.
Deep Water Culture (DWC)
Basically, a plant with it's roots growing directly in the nutrient. Any time you have stuck a plant cutting into a container of water to get it to root, you were using a very basic form of DWC. Most DWC systems also incorporate some form of aeration as well as a method to support the plant.
Here are some common systems that are all types of DWC;
Bubble Boxes
Lettuce Rafts (sorry no picture)
House plant in container of water


Common reservoirs for things like bubble boxes are coolers, ice chests (if you use Styrofoam, be sure to line it with plastic or it will seep liquid), or plastic bins. The house plants are simply in jars and bottles with some media to help hold the roots.

Most common aeration method for small systems is an aquarium air pump and air stone (air stones don't last forever and need to be replaced. I like the long heavy air stones that spread the bubbles out and don't need to be held down.) Completely no tech passive systems can be aerated by changing/stirring the nutrient regularly or blowing bubbles with a straw daily.


Options for plant support; Net pot (or cup with holes) with media suspended through lid in the reservoir, Direct suspension of plant through lid or other material (like securing a seedling in a plat disk of Styrofoam or plastic using a bit of cotton or something), I believe professional systems use neoprene disks or sleeves for this. Finally, some systems just put media right in the nutrient to support the plants, this works for plants that don't need much air to their roots and is what many of my houseplants are growing in.

I mentioned media, it usually isn't really talked of in DWC systems but most systems are not pure. If you are using a net pot or yogurt cup with holes, you will probably have to put something in it to keep the plant upright. I use large perlite (it is light weight and somewhat less costly than some of the other inert media. When dry the dust is bad to breath so wet it down before handling.) Other options include; manufactured clay balls or pellets (seem pricey to me,) rock wool (again pricey,) coco fiber (haven't tried it,) gravel (heavy,) sand (would go right through the holes,) bark or wood chips (I use those outdoors but they are usually too big for the cups,) vermiculite (similar to perlite but I haven't found any large enough for my use and the fine stuff would fall right through the holes,) Peat moss (too dusty and soft for my purpose,) Sawdust (similar to peat,) Spanish moss (I've tried it outdoors and it worked though broke down quickly, when I run out of perlite I'll probably try it for the lettuce cups but there is the drawback of it not being sterile,) I've even tried Styrofoam packing peanuts (I don't really recommend them. I suppose if you can't find any of the other free options that will work for you, have the Styrofoam peanuts on hand, and don't want to spend money on any of the manufactured media, then go ahead and try them.)
My primary Lettuce system!

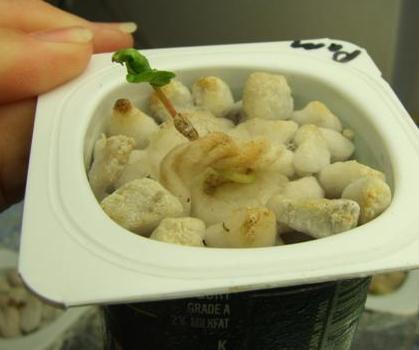
My lettuce systems have gone through several permutations but all have been some form of DWC. I am currently using an old (but intact, with lid removed) plastic ice chest. I have a board over the top with holes cut in it for the yogurt cups. There is a double aquarium air pump feeding two 14" long air stones . This systems holds a large amount of nutrient which helps buffer swings in strength and pH. Anyway, I've taken to adding a wick of rayon mop head yarn in the yogurt cups so that I can start seeds directly in the cups without having to deal with transplanting and then making sure nutrient is deep enough to reach the smallest seedlings. The mop heads are pretty inexpensive and I find that half of one of the yarns is long enough to make a double wick for the cup. Make sure to find the bright pure white rayon mop head since the cotton yarn variety don't wick nearly so well and will rot faster. I pulled the stitches out of the center of the mop head so I could pull the yarns out intact.


Back to the story, I prep a small yogurt cup by punching some holes in the bottom of it carefully with a knife (nothing fancy just some slits that I widen a bit by twisting the knife.) I take one of the mop yarns and cut in half and I fold the half in half. I then tie a knot in the half of the yarn so that the top of the loop in the middle will still reach the top of the cup when the ends are pulled through a couple of the holes and the knot is on the bottom of the cup. In this manner I make sure that there will be some wick near the top of the cup and it won't pull down. I then fill the cup with my media making sure to keep the top of the wick near the top of the cup. I can then put a little bit of cotton ball against the wick and place a lettuce seed on the cotton. I usually place the newly seeded cups in a smaller system that has plain water in it instead of nutrient. Once the seeds are sprouted I can move them into the big system. As for the nutrient/water levels, the wicks only seem to lift the liquid about 5 inches so for the seeds and tiny seedlings I need to make sure that the nutrient level is no more than 5 inches below the top of the cup. As the plants grow, I can let the nutrient level drop lower as the roots are moving down the cup. Eventually the roots will come out the bottoms of the cups and dangle right into the nutrient.
I have found that it is important to leave yourself a way to access the nutrient tank without having to lift up all your plants.

Here are some things I have tried with the lettuce in the past.
Originally I would start my seeds in egg cartons on cotton balls then transplant into the yogurt cups. I also tried placing the seedlings into disks of food packing foam. These methods did work but were quite tedious and required careful adjustment of fluid levels until the roots were well down into the reservoir. I started to experiment with ways to start the seeds directly where they could grow. A bit of cotton stuffed into the hole in the food packing foam disk was attempted but I had much trouble keeping the cotton moist without water logging the seeds. I even tried filling the reservoir part way full of perlite and Styrofoam packing peanuts, then placing cotton balls with seeds directly on it. The seedlings sprouted and grew but there was not enough support from the floating media and the plants tended to sink down as they grew. The floating media method did work but only for baby greens and spring onions. I definitely thing adding a wick to the cups is a winner in my book. Saves huge on time and seedling losses.
Trough Systems

The next type of system I will talk about are what I'm going to call trough systems. Ok, the normal term for them is Nutrient Film Technique (NFT) systems but I'm calling them troughs since most of mine have been "Modified".
In a traditional NFT system the plants are suspended in some sort of trough or tube without any media and the roots lay on the bottom of the trough when there is a thin film of nutrient constantly flowing. These systems generally require a pump (unless you can spend all day and night refilling a reservoir that will feed the flow.) If your pump or power goes out, the plants won't survive for long as there is no media to provide a buffer before the roots dry out. Traditional NFT is common among commercial hydroponic growers as it saves on the costs of media but may not be as practical for the majority of home hydroponic growers.
Modified NFT or media filled trough systems;
My troughs are simply plastic lined wood troughs (without lids) filled with media. I feed a flow of nutrient at the top and have screen on the bottom to keep the media from falling into the bucket that drains into my reservoir. Just about any media could work in such a system but some are more likely to clog the screen or slip through and be a problem for your pump. These troughs still require a pump but since they have media that can hold moisture, there is a buffer in case of pump or electrical failure. It is even possible to run the pump intermittently though most people don't do this as it increases the likely hood of mineral build up on pump components and thus pump failure.


My main crop in the troughs has been cucumbers. As media in troughs I have used; cypress mulch, plain old wood chips dropped off by a tree trimming service, and Spanish moss. The Moss did break down rather faster than the wood chips though it did work. The cypress mulch seems the best of the three I tried except that it does cost money. I get the regular wood chips for free. None of these are sterile but in such an outdoor system it didn't seem necessary. Do make sure to rinse off the materials before setting the trough to drain back to the reservoir or you will wind up with lots of little particles in there especially from the cypress mulch and wood chips. (It is a good idea to rinse any media before using it.) It is possible to start seeds right in such troughs as long as you run a wick from the nutrient flow up to the seed (though it is best to start with very weak nutrient or even plain water in such a situation.) Right now I've diluted the nutrient and have the troughs sort of blocked up and stuck some pond plants into the trough with very little media, so I intend to turn the outdoor hydroponic area into more of a water plant/pond system.


You can turn a trough system into more of a drip type system but I've noticed that clogging of the emitters can be a pain.
Media/Drip/DWC cross
Bucket systems and gurgle gardens. There are many types of bucket systems, some are simply recirculating drip systems (there is plumbing to supply as well as to drain the buckets that can be prone to clogging,) Others are DWC and some are a strange cross between these. A gurgle garden uses an air pump to lift some of the nutrient from a bottom bucket up to the top of the top bucket and gurgle or spit it out (like a drip system) where the plant can use it. These can only lift nutrient so far and hence are somewhat limited. I say gurgle gardens are a cross since the roots of the plant often grow down into the bottom container from the top and effectively turn it into a form of DWC and since the top container is usually full of media, it is a media system. The primary drawback I find with gurgle gardens is that you normally must lift the top container (with the plant) off of the lower container in order to access the nutrient for testing and re-filling. That lifting becomes difficult if the plants are big ones.
I have built a couple solar powered gurgle gardens. The solar powered pump I set up from surplus parts. One set up is a colander I found in the trash that fits in the top of a flower pot I had that didn't have any holes. The other is a big bowl shaped pot with holes on top of another large pot without holes. I have a third solar air pump unit that I am using for extra aerating in my outdoor reservoir. In these solar powered gurgle gardens I have grown snow peas and Chinese Kale. It worked well enough though if there are long periods without sun, manual scooping and watering with the nutrient may be necessary. I used perlite as the media in these systems.
Ebb & Flow
In an ebb and flow system the plants are in media (often in their own containers or net pots) in a large tray of some sort that can be flooded for a time and then allowed to drain out for a time (the cycle usually happens several times a day.) They can be passive (as in manual with no electricity or pumps) or use pumps and timers. In the passive versions you might have a bucket with a tube near it's bottom attached to the tray with a the tube near it's bottom, when you want to flood the tray, lift the bucket with nutrient above the tray for a time, when it is time to drain the tray, place the bucket below the level of the tray and the nutrient should flow back into the bucket. The pump systems usually place the reservoir with pump below the tray and a timer turns the pump on to flow up into a fitting near the bottom of the tray and flood it. When the pump turns off the nutrient drains back through the pump into the reservoir. There are generally also overflow fittings involved. You don't want to use any media that can float in such a system so perlite, vermiculite, peat, sawdust, and coco fiber are probably all out. I'm not sure about wood chips, bark, or Spanish moss.
I have not tried any Ebb & Flow systems so my knowledge is all from reading.
Simple stick the plant in water.
This is how I'm growing most of my house plants. Ok, I do have water crystals in many of the containers along with perlite and/or colored aquarium gravel. Most of these plants are rooted cuttings of pothos that have never touched dirt. They do pretty well with minimal nutrient and little/no aeration. The water crystals (I got a jar of soil moist once and still have lots) seem to allow the water level to drop an let some air in without the plant roots drying too much. Eventually the crystals will start to turn green and I don't know how to fix that without harming the plant short of throwing the crystals away and replacing them. The water crystals should never be put down a drain and if spilled on the floor, they are very slippery and difficult to pick up. Eventually the crystals will break down and it happens quicker the more exposure they have to UV light. The chemicals they break down into may not be so environmentally friendly so I am limiting my use of them to just the house plants. Some plants I simply have in bottles/jars of water. With the ones in water it is much easier to rinse the containers out so I feel easier about feeding those plants but the plain water seems to become stagnant and dirty quicker than the stuff with crystals. The plain water plants probably don't get as much aeration but I have not seen a marked difference in the growth between the two methods.